The collection of items in the photo is all of the tools that I needed to cut the theorbo triple rose. At the top is a bottle of mucilage that I use to glue the rose pattern into the belly wood. Mucilage is a glue usually associated with children's crafts. Since I cut the pattern from the front I need to remove the remaining paper of the pattern so I want a glue that is easy to remove. Which it is. Next is a well used block of paraffin for lubricating the knives. The circle cutter is used for scoring the borders of the roses as I described in previous posts. Of the two knives that I used the first is an X-acto with a #11 blade. The second is a small violin maker's knife. Two sizes of small gouges came in handy for scoring the outline of the tighter curves of the organic elements of the design. I do use small chisels (not shown) for some roses but they were not useful for this design. I do use a small magnifying glass. I do all of my carving on a self healing mat.
I want to demonstrate several features of my carving technique so I made an enlargement of the rose pattern - one that would show up better in a photo - and glued it to a scrape piece of soundboard spruce. Using the violin maker's knife I score all of the lines on the pattern, firmly and precisely as possible. In the photo at the left I am using the violin maker's knife because it has a thicker blade that is easier to control. If I deviate from the pattern I balance the mistake by maintaining the proper width when I cut the opposing line. Although I have reduced the soundboard thickness to 1.1 - 1.2 mm in the rose area it usually isn't possible to cut completely through the belly in one stroke. The elements of the design, especially the ones that align across the grain of the wood , are weak and easily broken. To prevent this I cut a "relief" to the line. That is what I am doing in the photo. You can see a bit of the paper pattern and wood curl up. This is accomplished by holding the knife at a 30-40 degrees angle while making a cut parallel to the original perpendicular one. The adjacent area has already been "relieved".
Here I am making my final cuts. I am using the X-acto #11 because it has a thinner blade and is less likely to push the wood apart, fracturing the fragile rose pieces. I seldom use the #11 for the initial cuts because the blades are too flexible and are harder to control.
The direction of these cuts is important. Although it is not clearly visible, the grain of the soundboard runs from side to side in the photo. All of the cuts run across the grain at varying angles. To prevent the end of the exposed grain from grabbing the knife and throwing it off course I cut "down" grain or with the "nap". You can feel this effect by making similar cuts diagonally in each direction on a piece of spruce. A key to understanding the problem is to note that the direction of the cuts on opposite sides of the center element between the two marked areas are opposite. It is a good idea not to remove a waste area until the adjacent areas are completely cut. Making the final cut on one side of an element that is not supported on the opposite side can lead to breakage. Note: Lubricate your knife frequently with paraffin.
The border of each rose has a ring of diagonal blocks that are chip carved on their corners. I lay out the spacing for these with a template that I made specially for each rose.
It is made with a protractor on a piece of poster stock. The circle of the rose border is marked off in five degree intervals and an area corresponding to the border is cut out. This template is positioned exactly over the rose border and taped in place. Now a knife cut can be made diagonally from one line to the next. The result is 72 equally spaced diagonal blocks. Two opposing edges of each block are now chipped off to create the final effect.
I have finished the theorbo so obviously it is quicker to build them than to blog about them. My next post will explain my system for barring the soundboard.
My theorbo's new home is the Music Department of Grand Valley State University in Michigan.
This is a blog about building lutes and historical guitars. It is not only a "how to" blog but also a "why" blog. I have always enjoyed thinking about lutes and guitars as much as building them. I also enjoy the music associated with the instruments I build as well as the inspiration I gain from visits to museums to examine them.
Wednesday, November 2, 2011
Wednesday, October 26, 2011
Carving Lute Roses - a Triple Rose
I often decide to use a rose design other than the one that appears on the original of the model that I am building. This is the third Kaiser theorbo that I have built in the last 12 months and for this one I decided to borrow the triple rose that is cut into the belly of a theorbo by Pietro Railich. On the right is the original 17th century Railich rose. I examined this lute several years ago and wrote a story about this lute for my website. You can see it at:
http://www.schreinerlutes.com/projects.html
This is a fairly open design that would look too simple if it were reproduced in a larger format, such as a single rose on the face of a lute, but here the appearance is lacy and elegant because of its small size. The diameter of each of the larger pair of roses only measure 68 mm. The smaller, single rose is 61 mm. The design is composed of two smaller concentric circles inside the larger diameter of the entire design. A series of repeating arcs based on the division of the whole into sixteen parts fills out the design. The leaf and bud motif gives it an organic touch.
I drew the design about 50% larger than size that I would need in order gauge the thickness of the individual elements. Then I reduced copies of it to the size that I needed on a photocopier.
Once I had the rose pattern finished I still wasn't ready to begin carving. Triple roses are usually laid out so that the decorative surrounding rings inter-connect. This takes some careful calculation and adjustment of the compass. You can appreciate the exactness that is necessary in the closeup photo of my finished rose. Note too, that there is no marks in the center of the roses from the compass point. Many surviving historical lutes show thee blemishes. I wanted to avoid them. The center photo demonstrates my technique.
The trammel point of the circle cutter rests in a tiny hole that I drilled into, but not through, a small scrape of ebony that I "tack" glued to the soundboard. This way I was able to draw the inter-locking decorative circles with a compass first to make sure that everything lined up. Then I was able to confidently score them with the circle cutter. The ebony blocks, after serving their purpose, are removed by touching them with a hot iron for a few seconds. This melts and releases the glue.
The last photo shows that I am well under way. I have finished scoring the interlocking rings, glued the small rose pattern in place and done some rose carving. Next time I'll talk about the tools, explain some carving techniques and talk about the ever present problems and pitfalls.
Saturday, October 22, 2011
Carving Lute Roses
This is the rose that I just finished for my Kaiser theorbo. I started working on it about ten days ago and although I worked on other parts of the theorbo at the same time the rose was the centre of my attention. The lute rose is the centre of the universe, literally! A lute without a rose isn't a lute. The rose is an expression of passion and skill. A beautiful rose is the artisan's gift. They are also bloody difficult to carve.
This blog will look at the mechanics of carving lute roses; the problem of achieving symmetry and some of the tools that I find useful. But what I am really interested in is the manufacture of the historical rose. My research reveals some interesting surprises. I'll continue in a day or two.
Tuesday, October 18, 2011
Kaiser Theorbo Neck
Here's the Kaiser propped up on a chair with the rough neck blank sitting in place. The neck blank is made from three pieces of edge glued straight grain sitka spruce. It is slightly over size in all dimensions. I cut the angle in the front block of the bowl and a matching angle in the neck blank. To hold the blank in place while I adjust the angle I use two wood tabs that extend across the joint. These are screwed and glued lightly to the front block. Once the angle is correct I tack glue the neck blank in place. When the glue dries I drill a hole through the front block into the neck blank and insert a screw. Once this is secure I can lay out the lute's center line, the edges of the neck, its length and the curvature of the neck which will match the profile of the front of the bowl.
After detaching the blank I shape it to its finished contours with a block plane and a flexible steel scraper making sure that neck's curvature is smooth and comfortable to hold. I then apply a primer coat of glue. This neck, when the lute is finished, with the fingerboard and neck veneer in place will be 107 mm wide and 30 mm thick at the neck joint.
In earlier years I have used various woods for neck blanks; basswood, poplar, maple and walnut. There is something to be said for each choice. But now I want my neck wood to be actively acoustical and I think spruce offers that.
I usually choose to apply an ebony veneer or an ebony veneer with
white holly spacers numbering from 7 to 19. Here I decided to forego the holly spacers and alternate ebony and walnut strips . I had several ebony ribs left over from another project so I cut these into narrow strips of the necessary length and width and glued them together with an equal number of walnut strips, face to face. When the glue dried I planed one edge of this assemblage flat. Then I laid out the line that represented the taper from one end to the other. I planed that flat and separated the strips by submersing them in hot water. When dry I laid them out edge to edge in order to check for straightness. It is a good idea to plane a slight bevel on the under side of each edge as this allows the assembled veneer pieces to bend around the curvature of the neck. When I lay out the veneer pieces I stretch painter's tape over them to hold them together. More glue is applied to the neck blank and the veneer is taped into place and secured with elastic wrap. The photo shows this sequence after the glue has dried and I have begun to unwrap the neck.
I always make the width of the veneer covering less than what is necessary to completely cover the neck. The reason for this is that if it is slightly too broad wrapping the neck with elastic will cause the the sheet of veneer to bunch up and not lie smoothly on the neck surface or it will damage the two outside edges. To finish the edges I lightly plane a flat edge perpendicular to the fingerboard face of the neck. This allows me to cover this surface with a thin rectangular strip of matching wood. Subsequently these two pieces are levelled with the surface of the veneer. The photo shows one side that has already been levelled and blended into the veneer while the other side is awaiting the same treatment.
After rechecking the neck alignment the neck can be glued in place. Previously, I found that the viscosity of glue caused the neck to slip up the surface of the front block when I tightened the screw resulting in a mis-aligned neck. That is the reason I use the wooden tabs that I described at the beginning of this post.
Interestingly, while reviewing the museum photos of the Alban theorbo in the German National Museum I found one that suggested just such an arrangement. Two holes, among others, were drilled in the top of the front block in a position just where such tabs would be located.
Photo: MIR 908
Property of German National Museum, Nuremberg
After detaching the blank I shape it to its finished contours with a block plane and a flexible steel scraper making sure that neck's curvature is smooth and comfortable to hold. I then apply a primer coat of glue. This neck, when the lute is finished, with the fingerboard and neck veneer in place will be 107 mm wide and 30 mm thick at the neck joint.
In earlier years I have used various woods for neck blanks; basswood, poplar, maple and walnut. There is something to be said for each choice. But now I want my neck wood to be actively acoustical and I think spruce offers that.
I usually choose to apply an ebony veneer or an ebony veneer with
white holly spacers numbering from 7 to 19. Here I decided to forego the holly spacers and alternate ebony and walnut strips . I had several ebony ribs left over from another project so I cut these into narrow strips of the necessary length and width and glued them together with an equal number of walnut strips, face to face. When the glue dried I planed one edge of this assemblage flat. Then I laid out the line that represented the taper from one end to the other. I planed that flat and separated the strips by submersing them in hot water. When dry I laid them out edge to edge in order to check for straightness. It is a good idea to plane a slight bevel on the under side of each edge as this allows the assembled veneer pieces to bend around the curvature of the neck. When I lay out the veneer pieces I stretch painter's tape over them to hold them together. More glue is applied to the neck blank and the veneer is taped into place and secured with elastic wrap. The photo shows this sequence after the glue has dried and I have begun to unwrap the neck.
I always make the width of the veneer covering less than what is necessary to completely cover the neck. The reason for this is that if it is slightly too broad wrapping the neck with elastic will cause the the sheet of veneer to bunch up and not lie smoothly on the neck surface or it will damage the two outside edges. To finish the edges I lightly plane a flat edge perpendicular to the fingerboard face of the neck. This allows me to cover this surface with a thin rectangular strip of matching wood. Subsequently these two pieces are levelled with the surface of the veneer. The photo shows one side that has already been levelled and blended into the veneer while the other side is awaiting the same treatment.
After rechecking the neck alignment the neck can be glued in place. Previously, I found that the viscosity of glue caused the neck to slip up the surface of the front block when I tightened the screw resulting in a mis-aligned neck. That is the reason I use the wooden tabs that I described at the beginning of this post.
Interestingly, while reviewing the museum photos of the Alban theorbo in the German National Museum I found one that suggested just such an arrangement. Two holes, among others, were drilled in the top of the front block in a position just where such tabs would be located.
Photo: MIR 908
Property of German National Museum, Nuremberg
Friday, October 14, 2011
Inside the Kaiser bowl cont'd
![]() |
| Marx Unverdorben, Fenton house, London |
The next two examples are from a little known Hans Frei at the Met in New York and a Pietro Railich theorbo in Brussels.
![]() |
| Hans Frei |
This the only photo that I have showing the size of the apron relative to the width of the bowl. The inside apron measures 32 cm long, 29 mm deep but only 4 mm thick at its maximum. It tapers to 1 mm at the ends. The bowl is 31.6 cm wide. It is noteworthy that this inside apron is sculpted from 4 mm at the top surface that glues to the belly to 1 mm at the bottom along its entire length.
![]() |
| Pietro Railich |
This photo shows the inside rear of the bowl of a lute by Laux Maler that until recently was held privately and unknown to the lute community. It had been converted into a lute-guitar as was the fashion in the 19th century and while being restored to a more original configuration the restorer discovered the original Maler label under added paper reinforcement. The lute was subsequently purchased by the Musee de la musique, Paris. If you look closely, the remains of the inside apron are visible but only as a half circle nub of wood. The original apron had been truncated into a style typical for guitars. Since it was being rebuilt into a guitar, custom dictated that it should have an end block. Somehow, changing this construction feature was an essential part of creating the "guitar" sound. I taught instrument making for many years and one of my students built a lute-guitar. Although it had many guitar-like features besides an end block, my student remarked disappointedly when he finished:"It doesn't sound like a lute, it sounds like a guitar."
It seems to me, from the examples that I have seen and the experimentation that I have done, that there are benefits to providing a firm gluing surface along the rear edge of the belly not just for structural stability but for acoustical stability. By that I mean the ability to control, by the length, breadth or depth of the inside apron, the vibration of the bridge and belly in this very critical area in order to achieve an extra degree of resonance, clarity or sonority. Removing a portion of the wood from the inside apron by sculpting from top to bottom, as indicated in several examples, demonstrates the principle of maintaining strength but reducing mass which is really what historical lute building is all about.
My Kaiser inside apron measures 27 cm long, 35mm deep and 6.5 mm thick tapered to 1 mm at the ends and bottom. The bowl is 38 cm wide.
Wednesday, October 12, 2011
Inside the Kaiser bowl
I have been away for a week but in the few days before leaving I removed the bowl from the mould, papered over the inside of the rib joints, made and glued the inside apron in place. I also shaped the wood core for the neck, fitted the joint between the neck and the bowl and made and glued on the decorative veneer. In this blog I will describe my work inside the bowl.
Since I had previously loosened the ribs from the mould as I constructed the bowl I had no difficulty in removing the finished bowl from the mould. Three tiny spots of glue had held the front block to the mould and the rear tips of the ribs were glued to the mould during construction. Both spots were released by slipping a small knife between the bowl and the mould. The bowl then slid off the mould.
I lightly scraped the inside of the rib joints with a curved scraper in order to prepare the surface for gluing on the paper reinforcement strips. For the paper I use 90 lbs hot press water colour paper cut into strips 7 mm wide. Their application is sticky and tedious. I soak each strip for a few seconds in the hot water bath that I use to heat the glue. My "glue pot" is visible in the upper right of the photo. The glue is a thin hide glue made from pellets or "pearls" that I buy from Lee Valley Tools. I apply glue generously to both the water-logged paper and the joint. After pressing a few strips into place I clean up the area with a hot damp cloth. When finished, I insert a temporary "false belly" inside the top edge of the bowl. This keeps everything stable while the glue dries.
Learning from Mistakes. The second lute that I built was made with 21 (I think) maple ribs without spacers. I found the construction terribly difficult. One day I found that it was easier than before so I worked late. When I finished the bowl I was elated. But when I glued in the paper strips and returned after going home for the day I found that the outside of the rib joints had opened up. Not separated but puckered up -- open on the outside but firmly glued on the inside. My beautiful joints were wreaked. Since then, I cover the outside of the bowl completely with plastic wrapping tape before I remove it from the mould and I leave it there until the glue from the papering is dry.
Here is a photo of the inside apron glued in place. I think that the size, shape and the material that the inside rear apron or contre-brague is made from is very important. When I have seen this feature in old lutes it is apparent that makers and re-builders (in recent centuries) have fashioned and re-fashioned this construction feature to suit some conceived purpose. The apron serves two uses; it stiffens the rear of the bowl and it provides a gluing surface for the belly. But when you think about it, how much do you want to stiffen the bowl and how much gluing surface do you want to provide? Obviously the degree of stiffening effects the resonance of the instrument. Opinions vary.
It has gotten late and I want to dig up some old photos to make my point. So I will continue in a day or two.
Since I had previously loosened the ribs from the mould as I constructed the bowl I had no difficulty in removing the finished bowl from the mould. Three tiny spots of glue had held the front block to the mould and the rear tips of the ribs were glued to the mould during construction. Both spots were released by slipping a small knife between the bowl and the mould. The bowl then slid off the mould.
I lightly scraped the inside of the rib joints with a curved scraper in order to prepare the surface for gluing on the paper reinforcement strips. For the paper I use 90 lbs hot press water colour paper cut into strips 7 mm wide. Their application is sticky and tedious. I soak each strip for a few seconds in the hot water bath that I use to heat the glue. My "glue pot" is visible in the upper right of the photo. The glue is a thin hide glue made from pellets or "pearls" that I buy from Lee Valley Tools. I apply glue generously to both the water-logged paper and the joint. After pressing a few strips into place I clean up the area with a hot damp cloth. When finished, I insert a temporary "false belly" inside the top edge of the bowl. This keeps everything stable while the glue dries.
Learning from Mistakes. The second lute that I built was made with 21 (I think) maple ribs without spacers. I found the construction terribly difficult. One day I found that it was easier than before so I worked late. When I finished the bowl I was elated. But when I glued in the paper strips and returned after going home for the day I found that the outside of the rib joints had opened up. Not separated but puckered up -- open on the outside but firmly glued on the inside. My beautiful joints were wreaked. Since then, I cover the outside of the bowl completely with plastic wrapping tape before I remove it from the mould and I leave it there until the glue from the papering is dry.
It has gotten late and I want to dig up some old photos to make my point. So I will continue in a day or two.
Tuesday, October 4, 2011
Applying the Apron
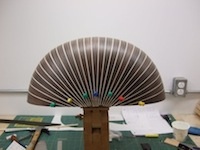
At this stage I have not only finished applying all of the ribs I have also done a fair amount cleaning up. Each day I begin work on the bowl by removing the residual glue and any high spots between the ribs of the previous day's work. Also, I slip a thin artist's scapel under the most recently glued ribs to loosen them from the mould. When I am finished with the bowl I don't want to find that it is firmly glued to the mould. Now I only have to make sure that the rib joints at the rear are secure. These are very fragile and have a tendency to break open. I often rub extra glue over the surface of the bowl in this area, cover it with plastic tape and all it to dry for a day before I start the next stage. In the photo I have secured them with push pins.
I like to apply the apron to the rear of the bowl before I remove it from the mould for several reasons. The rear of any bowl at this stage is very fragile. The glue joints can easily break open. Also the bowls are so flexible they will distort when the support of the mould is removed. Having the apron in place helps to insure the stability of the bowl.
Depending on the style of the bowl and the contour of the rear area the apron can be one or several separate pieces. Although the original Kaiser has a single piece apron in ivory I think that a multiple piece one is appropriate. The technique is to bend the individual pieces in the same manner as ribs. It is even necessary to bend them sideways in order to get them to settle against the bowl properly. Each one is glued in place separately with spring clamps and wooden cauls. The cauls are concave on the contact side which allows the clamping pressure to equalize over the width of the apron part. To insure that no gaps occur between each piece I gently tap the top edge after I apply each clamp. To accommodate the clamps while the bowl is on the mould I have cut a continuous channel in the under side of mould equaling the length of the apron.
The photo on the right shows all of the clamps in place. As the apron increases in depth it is necessary to use longer cauls and different clamps. Since I assemble the apron on the bowl from individual pieces I can not cut the characteristic design at each end in advance. This I do after the glue has dried and I have cleaned up my work. The photo below shows the finished design. I accomplish this by first making a diagonal saw cut across all of the pieces of the apron. It is very important not to cut into the rib below. I lay out the circular element of the design and score that with an appropriately size of gouge, cutting through the material to the rib surface. The excess apron material is removed with a hot iron.
The second photo shows what happened to Johannes Jauck in 1746 when his diagonal cut went astray.
This lute is No. 251, Musical Instrument Museum, Brussels, photo by the author.
I like to apply the apron to the rear of the bowl before I remove it from the mould for several reasons. The rear of any bowl at this stage is very fragile. The glue joints can easily break open. Also the bowls are so flexible they will distort when the support of the mould is removed. Having the apron in place helps to insure the stability of the bowl.
Depending on the style of the bowl and the contour of the rear area the apron can be one or several separate pieces. Although the original Kaiser has a single piece apron in ivory I think that a multiple piece one is appropriate. The technique is to bend the individual pieces in the same manner as ribs. It is even necessary to bend them sideways in order to get them to settle against the bowl properly. Each one is glued in place separately with spring clamps and wooden cauls. The cauls are concave on the contact side which allows the clamping pressure to equalize over the width of the apron part. To insure that no gaps occur between each piece I gently tap the top edge after I apply each clamp. To accommodate the clamps while the bowl is on the mould I have cut a continuous channel in the under side of mould equaling the length of the apron.
The photo on the right shows all of the clamps in place. As the apron increases in depth it is necessary to use longer cauls and different clamps. Since I assemble the apron on the bowl from individual pieces I can not cut the characteristic design at each end in advance. This I do after the glue has dried and I have cleaned up my work. The photo below shows the finished design. I accomplish this by first making a diagonal saw cut across all of the pieces of the apron. It is very important not to cut into the rib below. I lay out the circular element of the design and score that with an appropriately size of gouge, cutting through the material to the rib surface. The excess apron material is removed with a hot iron.
The second photo shows what happened to Johannes Jauck in 1746 when his diagonal cut went astray.
This lute is No. 251, Musical Instrument Museum, Brussels, photo by the author.
Subscribe to:
Posts (Atom)