Wednesday, April 2, 2014

Schreiner's Lutes and Guitars March Update

CATCHING UP


 I have been unhappy with the frequency that I am able to publish posts. When I started my blog two years ago I was able to publish twice a month on average. My topics were generally uniform: following one instrument through the different stages of construction until I was finished. For me this was satisfying and I know you enjoyed my it because my page views increased month after month.


That changed about a year ago when things became disjointed. It is my fault because I take on too much as I always seek new challenges and I have trouble saying no to clients. Projects pile up and I get myself in trouble. This affects  a lot of things including my blog posts. It is difficult to keep continuity from one post to another.


Occasionally I have published updates but now I am going to try to make them a regular feature. This will be just what the name suggests, news about the progress of my projects but also about daily events  in my work that I think you will be interested in. Today is the first under this new format.


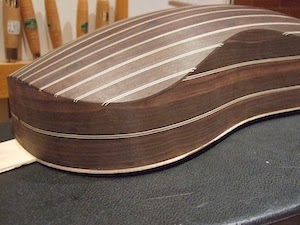
The four photos represent the projects that I'm working on daily or those that are not far from my thoughts. The triple rose belongs to a Koch theorbo, the same model that I built last year for Adlai Stevenson High School in Illinois. I finished cutting the rose before dinner so tomorrow I'll bar the top. The second photo is the Checchucci guitar. I finished the border that is composed of bone parallelograms and black epoxy. I'm sawing out the moustaches for the bridge and then it is on to finishing. The lute is a model of C. 45, the Tieffenbrucker archlute in Vienna. I am building it as an eleven course. It is awaiting its rose and belly. The Panormo guitar in the fourth photo now has its back but it will be a few weeks before much else happens to it.

EVENTS


A recent visitor to my shop was Ghareb El Tally, a lutenist/guitarist based in Salzburg. He is in Toronto for a few months and I met him when his archlute needed some work. When he mentioned he had a Roudhloff guitar from the 1840s (Ghareb tells me the guitar is dated 1815, edited April 5 ) converted to an 8 string I asked him to bring it by so I could see it.


Ghareb El Tally Photo

 Ghareb found the guitar in junk shop in miserable condition. Deciding that it could not be restored he had a Viennese guitar builder do the conversion. The back and soundboard were salvageable, the side ribs were re-contructed and the original neck was saved as a artifact.

This style of conversion is often done to modern six string guitars and the work that Ghareb had done follows the same method. The body was fitted with a classical guitar style neck and fingerboard widened to accommodate eight strings and a slotted peghead with mechanical tuners. A modern bridge completed the conversion. Since the back and belly were original and unaltered I was interested in recording their dimensions. I traced the contour, determined the original harmonic bar locations and with a magnetic probe measured the thickness of the back, top and sides.

A few days ago I was offered the opportunity to examine and measure an 1828 Panormo guitar that is in original condition. This is terrific because I have the guitar for a few days and I can study it at my leisure. I don't doubt that I'll have more to report on this instrument in the future.

Tuesday, March 11, 2014

Checchucci Guitar - Making the Peghead


Jacopo Checchucci MFA Boston, author's photo

 Even without the inlaid ivory arabesque of the original the peghead design is graceful and interesting. It is also fairly complicated to construct accurately.


Face view


A central panel in ebony is surrounded by a border of lighter wood  (I used Kingwood) that is edged with two triple lines of holly (ivory on the original)/ebony/holly mitred at the corners. The face and rear share the same design.  This border makes an elegant frame for the ten peg holes that pass through it. But there is very little space for error in aligning the two decorative panels.

Rear view


The photo below shows the end of the finished peghead.  Note that the laminates that are visible on the edge of the peghead are not continuous across the its width.


 Often fancy pegheads are assembled from thin veneer stacked one on the other. That is not the technique that Checchucci utilized. He constructed the decorative panels of the face and rear on a plain wood core. His trick is that he uses the edges of the core to establish the outer edges of the peg hole border. This ensures that the front and rear line up properly. The exposed end of his core was painted black to match the ebony over-lay. I treated mine differently as I will soon explain.


 At left, I made a poplar wood core and cut the "V" joint to fit the neck.


Rear view of the peghead


In the photo at right I have already assembled the decorative panel on the face and I am continuing on the rear. I glued an ebony plate in the proper location on the rear of the peghead core, but rather than trying to get it in exactly the right location relative to the finished panel on the face, I made it slightly over-size. Then, using the edges of the core against the guide of my miniature table saw I trimmed it exactly to size. The cross cut at the end of the ebony plate was achieved using the table saw guide too. Checchucci could not have accomplished this work as quickly but he obtained the same result probably by laying out the precise lines using a marking gauge and then trimming the ebony plate with a veneer saw rigged with a guide.


Once the ebony plate is precisely trimmed it is a fairly simple manner to assemble the peg hole border so that it fits exactly to the edge of the core block. While Checchucci painted the end of the core black, I cut my core even with the top edge of the peg hole border rather than extending it and added a solid ebony block to the end instead. That is seen in the photo at left


The last element to be added to the core is the laminated edge piece that will be shaped into the characteristic scalloped edge. The stacked layers are clearly visible in the end view of the peghead shown in a previous photo.


When I examined the original guitar I thought the method of construction using a core made of common wood was an example of a historic luthier going to a lot of effort to save valuable material. Instead it turned out to be a clever method to solve a complicated construction problem. I am always amazed to find examples like this.


           ***


Sunday, February 16, 2014

Schreiner's Lutes and Guitars February Update


I am suffering from the February Blahs but since the beginning of the year I have gotten a lot done.  Here's a run-down of the projects that I am working on.


 The upkeep and repairs to the instruments that I have built over the years is never-ending. I have put this activity on a strict schedule. It is the only way to keep from being over whelmed. Everyone has the same problem. I mentioned this to a colleague who said he was afraid to even answer the phone.

This is an eight course Frei that I built ten years ago. The belly was smashed but the bridge and rose survived so I inserted the rose into a new soundboard and got things back together.


I continue to make slow progress on the Checchucci guitar. The border is composed of a zig-zag pattern of ivory (I'm using cow bone) lozenges set between white / black binding strips and filled with black mastic like the rose border. In the photo I am working around the perimeter gluing the individual pieces in place before adding the black filler. 
Because of  the demands on my time from other projects I work on the Checchucci only when I am assured that I will have several uninterrupted days. This is difficult work that requires focus.


 I have finished assembling the 15 ribs of another Koch theorbo. This example will vary only in minor details from the one that I finished last fall. See my posts from 9/20/13 and 4/15/13.


At the end of last year I decided over the holiday season to get a good start on a Tieffenbrucher eleven course. The model an archlute, No. 41 (formerly C. 45) in Kunsthistorisches Museum, Vienna. I often build this lute as a ten course but my client wants to string and use it as a transitional era eleven retaining the old tuning.  The lute still lacks its belly and rose.


 Last year I replaced the fingerboard on a 1831 Panormo guitar that played hopelessly out of tune (see my post from    4/5/13). I took measurements and made various drawings and have now started to build a model. I am assembling it, Spanish style, without a mold on a solera.


I am photo-documenting all of my projects so I will be able to post at length on them in the near future.


Monday, December 30, 2013

Checchucci Guitar - The Harmonic Barring

I always string up and play my instruments "in the white" as soon as it is practical to do so. You can see that I haven't inlaid the edge purfling or applied the moustaches to the bridge. With the guitar in this semi-completed state I can still judge the quality and strength of tone and the guitar's playability. If changes need to be made, it is easier to do them unencumbered by varnishes and decorative appurtenances.

I was impatient to hear what my Checchucci sounded like. The harmonic barring of the original is minimal and somewhat unusual. Photos taken during the restoration of the guitar show only three harmonic bars; one between the rose and the neck, a second immediately to the bridge side of the rose and a third about half way between the rose and the bridge. Both of the last two bars are angled off the horizontal by about seven degrees.
Photo: Checchucci, MFA, Boston
The unusual feature is that these bars slope from higher on the treble side to lower on the bass. This is the reverse of what is usually seen on period guitars.  I found this puzzling. To make matters more confusing I wasn't convinced that the positions of the bars were original. A faint trace of a glue line is visible at the waist, below the rose hole, that suggests an angled bar that sloped in the opposite direction - the direction that I would expect. If the third bar, the lower bar, is original there is no indication that it has been moved.

The Museum of Fine Arts, Boston has an audio recording attached to the guitar's webpage http://www.mfa.org/collections/object/guitar-128556   but it was no longer functioning when I last tried it. This is unfortunate because there are few opportunities to hear original instruments. Hopefully, the malfunction is temporary.


My Voboam barring pattern

I couldn't decide whether to use the barring design as it is appears in the restoration photo or to adapt some features of it or to use another system all together. Players have told me that they distinguish between styles of baroque guitars; in general preferring vaulted back guitars for strumming and flat back ones for plucking. I agree, but I think it is possible to expand on this perception.  In today's period guitar world vaulted back guitars are usually represented by Italian models that were built in the first half of the 17th century. Flat back guitars are often patterned after French examples from the 1670 - 1690  (I know there are popular exceptions and guitars by Stradivari and Koch are examples).  Furthermore, it seems that guitars dating from later in the 17th century were fitted with additional struts such as those from the Voboam family (see my post from March 6, 2012). These features coincide with the era from composer-guitarist Corbette to Visée when a premium was placed on instruments that were ultra-responsive and well-balanced.


Photo: MFA, Boston
 But what to make of the Checchucci barring pattern -- what was he trying to accomplish? I think the key to understanding his intent is to be found in the shortened neck. It has only nine frets above the neck joint which is certainly not enough range for a virtuoso who would be unlikely to own such an ornate guitar. There are other clues; the width of the neck at the nut is among the widest measuring 47mm while the width at the joint with the body is only 53mm which doesn't provide much space for the strings to splay out at on the bridge. The bridge is a modern replacement so it is not possible to know the original string spacing, but it must have been narrow. However, the combination of a wide nut and a narrow bridge allow for easy left hand chording and effortless strumming. The barring, being the reverse of the pattern that supports and enhances the treble, in this case, accentuates the bass. These features suggest to me that the guitar was built as a sort of 17th century "rhythm guitar" affording the amateur guitar connoisseur the opportunity to jam with his musicians -- pounding out a ground in the same way the rhythm guitarist did in the Swing Band era.


My Checchucci barring solution


Although I know of no historical examples of two angled harmonic bars * (see edit) I am familiar with variations on the idea. Two examples come to mind; the Ashmolean Stradivari built in 1688 has a single bar angled toward the treble but placed further away from the rose and many makers, through several centuries, have used a straight bar or angled bar placed just above the bridge. I have used both previously, on guitars from various eras, but never together.

My solution to barring my Checchucci was to acknowledge his contribution by placing two bars in the same positions that he chose but angling them toward the treble instead of the bass. In order to keep the total barring light I again followed Checchucci's example and omitted the second strut that I usually put across the upper bout and installed a single "finger" directly under the first string instead of the flat wood plate (which may not be original) to support the belly frets.

When I strung my model and played it in my limited way, it was fully resonate across its register with strength and clarity in the treble and a measure of silvery lightness throughout. I thought that it should have a different combination of attributes than my Voboam, Koch and Oth models and it does.

Now I am ready to inlay the "ivory" lozenges that make up the border of the soundboard. But while I'm working on that I'll describe assembling the neck and peghead in my next post.

All of December has been very festive and I'm enjoying the holidays and the opportunity to spend the days with family and friends and activities that I seldom have time for.

So, Happy New Year and wishing you all a healthy, happy and prosperous 2014!

*  I was leafing through my copy of the catalogue of Royal College of Music, Museum of Instruments, Part III, European Stringed Instruments, and found an x-ray photo of RCM 22, an unattributed baroque era guitar. The x-ray clearly shows two diagonal harmonic bars tilted toward the treble in much the same location as I chose. Since I examined this guitar in 2006 I must have been aware of the barring pattern but allowed it to drift too deeply into my subconscious.

The catalogue is available from; http://www.cph.rcm.ac.uk/GenPublicationsMuseumCat3.htm

January 25, 2014.


Wednesday, December 11, 2013

Checchucci Guitar Update

My progress on the Checchucci guitar has been slowed by commitments to other projects and by my decision to  completely re-do the vaulted back and to add inlaid triple fillets to the side ribs. You'll remember in my post from June 18 that I described repairing a collapsed portion of the vault and commenting on the hazard of copying a historical design.

I re-shaped the lower portion of the mould so that the vault was a little more pronounced in the problem area. The rib lines of the last three ribs were almost straight as you can see on the vaulted back on the left. The corresponding ribs on the new back (top right-hand corner of the photo) show a definite curve that strengthens the vault.


Guitar body before making the changes


While I was building the new back I was also thinking about inlaying a triple fillet into the side ribs. I had considered this before I started building the guitar but I couldn't figure out how to do it. Baroque guitar sides are usually assembled from multiple strips glued edge to edge forming the necessary height and then bent to the proper contour. Had I followed that procedure the result would have been side ribs with odd wavy inlaid lines because the ribs are not perpendicular to the soundboard but are angled in from the down towards the back.


Letting an idea ferment for a while can yield results. I suddenly had the idea of combining the principles of a marking gauge and a veining tool into one and cutting the groove for the inlay right into the finished sides of the guitar. The idea was to scribe two parallel lines, 2 mm apart, into each side of the guitar and then to scrape or gouge out the material between the lines. The procedure would require multiple passes, cutting deeper into the wood with each pass, so firmness of touch and complete stability of the tool and guitar were essential.


I cut a piece of  2 mm thick tool steel, ground a knife edge  single bevel on one end and a slightly angled but blunt scraping edge on the other end and tempered both ends. The cutting tool was mounted in a simple, but precisely made wooden block.


In order to provide stability to the guitar body, I glued a close fitting temporary front into the body and levelled the side ribs on a sanding board. Working on a flat surface, I held the guitar firmly under my fore-arm and pressing the scribing tool block against the flat work board I drew the  tool from one end of the guitar to the other, multiple times. The second parallel line was cut by flipping the blade in the tool holder and repeating the process.


 Once I was satisfied with the depth of the parallel lines I fixed the blunt scraping end of the tool in the wood holder. Although I took photos of the cutting and scraping process I can't find them.  They must have vaporized.

The side ribs are only 1.2 mm thick so I was worried that the pressure of the scraping tool would cause the rib to bow and subsequently throw the tool out of line, ruining the groove.


But all went well, although I did scrape through the side ribs in several places, and after test fitting I was able to glue the first fillet in place. In the areas where I installed the fillets I papered the inside of the ribs when all was finished.


 I liked the results and so much and since I was confident in the method I decided to add a second fillet. I made an extender block of the necessary height and screwed it to the bottom of my tool holder. Installing the second fillet went as smoothly as the first.


I am well along in assembling the neck and peghead with their unique veneer design. As soon as I have glued the neck to the body I'll report on my work again. In the meantime here are several photos of the Checchucci guitar to date.


Wednesday, October 30, 2013

Schreiner's Lute and Guitars -- Update

If you are wondering what has happened with the Checchucci guitar here is the latest view. I have made progress but it has been slowed by other commitments. I'll continue my reports on this instrument as I will soon have more time to concentrate on it.

The Koch theorbo (posts from Sept. 20 and April 19) was delivered earlier this month to the student baroque ensemble of Adlai Stevenson High School, located in a Chicago suburb. I believe it is important to promote Early Music particularly theorbo among young musicians so I was enthusiastic about being part of this project.


Much of my time the last few months has been taken up with repairs. I repair my own instruments and those by other makers that belong to my clients. Some of this work can be arranged in advance and I include it in my schedule. Others things arrive on short notice with tight deadlines. The owner of the first lute I want to show you contacted me in April. I was told it was from 1975 so I was looking forward to seeing it when it arrived last month.


The action had gotten far too high so I dis-assembled it and put it back together in proper alignment.

I like re-visiting my earlier work, not to see what I've done, not to be critical, but to see the story that belongs to each instrument. The bowl wood is Brazilian Rosewood. I found a plank of it at a neighbourhood lumber yard in East End Montreal around 1972 when I was living there. Wondering where there might be more I was sent to a warehouse in the suburbs. I found an aircraft hanger size building crammed floor to ceiling with the wood! The species is endangered and is now banned in international trade.


after Benedid 1783, Schreiner 2003
Other instruments unexpectedly develop problems and need to be looked after quickly. This photo arrived in an email Sunday night and the owner is now arranging to come to Toronto and to stay over while I fix it.


Unfortunately, some repairs that initially appear to be straight forward turn out to be nightmares.

 This is the neck block of a small theorbo with the neck and belly removed.  It is not one that I built but it belongs to one of my clients so I agreed to work on it.  I thought that only the neck joint had broken open, but it turned out that five of the eleven ribs of the bowl had, over time, come loose from the block. The lute had slowly folded up and become unplayable. While I worked on it one unwanted discovery led to another and what I scheduled as a simple repair -- wasn't!


Last month a lutenist who had recently moved to Ontario from Italy got in touch. The movers had damaged his archlute and he has a show scheduled for the middle of November.


The bowl was cracked through on the bass side of the end clasp leaving a jagged break and there was a nasty split in a soundboard. I removed the soundboard and carried out the repairs. I am just now touching up the varnish.


I still have two lutes waiting for my attention.
I have inserted knives to demonstrate the open joints
 One of my Kaiser theorbos (built 2000) was mistreated by baggage handlers on a flight to Charleston SC.  The neck joint popped which is fairly common and easy to fix. But the violence separated the soundboard tongue from the neck surface. They are both clean breaks but I will have to remove the soundboard in order to do the repair.


after Gerle, Schreiner 1996
 Good grief, how did this happen?

The rose is damaged but the broken parts will glue back without much trouble and the bridge is intact. The soundboard is a write-off. I'll salvage the rose and set it into a new soundboard.


 Also, I have gotten started on a special project. Toronto lutenist/guitarist Lucas Harris obtained an 1831 Giovanni Guadagnini guitar and I agreed to restore it. The work on this will go on for several more months. I am documenting everything so I will report on it in two or three posts when I am further along.


Next, I will finish the Checchucci guitar and in the coming months I'll finally get to work on new lutes; a couple of ten courses lutes, another Koch theorbo and a baroque guitar in A. That is the plan anyway.


Sunday, September 29, 2013

The 'Warwick' Frei Lute

I recently finished a model of the 'Warwick' Hans Frei lute. The original is conserved in the Market Hall Museum, Warwick UK. Although it has been one of my favorite models I didn't blog about building it because it, or rather I, literally fell victim to fate when I broke my knee (requiring surgery) just after I finished assembling the bowl. This happened before I started blogging. Unable to complete the lute, I fitted a false top to the bowl so it would retain its shape and placed it on a shelf in my studio to await a better day. But I wanted to blog about the lute and decided to focus on the original. So this post is shaped in part by my thoughts, but also by responses to queries that I made to fellow lute makers and lutenists.


I recently found out that at much at the same time as I was finishing my model, Adam Busiakiewicz, a curator  and lutenist at the museum were the Hans Frei is conserved, announced the idea to organize a lecture/mini recital about the Warwick Frei. https://twitter.com/Adam_TakeMeOut . Although Adam was to play on his own Frei copy, the museum agreed to display their original Hans Frei which had not been seen in public for many years. This took place on September 10 and I am sorry not to have known about it earlier. I did confirm with the museum that the Frei will be on display until October 19. http://heritage.warwickshire.gov.uk/museum-service/ .

The Warwick Frei has long been a popular model for contemporary lute makers as a visit to any maker's website will attest. The history of its conversion from a renaissance to a baroque lute is frequently noted. But little has been written about it and few photos appear in the public domain. Adam posted this photo
https://twitter.com/Adam_TakeMeOut/status/360087189415153664/photo/1  of the lute being played in the 1950s.

My favorite article and the one I re-visited for this post is: Michael Prynne, Galpin Society Journal, vol. 2, 1949 that described the Frei with measurements and four excellent photos. Online, this article can be downloaded from JSTOR, http://www.jstor.org/stable/841395

When I started building lutes no plans were available for the Frei, so I scaled up one of the photos from Prynne's article. For many builders this was the only available option. When plans were published in 1979 I bought those, but they are now in tatters. I just ordered a new set from The Lute Society: http://www.lutesociety.org/pages/catalogue#ma

The Warwick Frei was in playable condition in the 1950s  and presumably it still is. Prynne wonderfully describes the tone; "The tone of the lute is sweet, though quite small, with a rather reedy quality in the lower register. The notes hold out for a long time, and the richness in overtones and comparative weakness of the fundamental note produce to a marked degree the very intimate and sympathetic tone which is the lute's essential character."

Prynne's remarks are revealing because they relate to a curious feature in the graduation of the thickness of the Frei soundboard. It tapers in thickness from the area behind the bridge where it is unusually thick to the area around the neck joint where the thickness is more normal. In my opinion this thickness is responsible for the richness, intimate and sympathetic tone but not for the smallness of tone. The treatment of the harmonic barring, size, shape and placement  regulate the strength of tone. That is what I found in building models of the Warwick Frei and I think it is also true for other historical instruments that have unusually thick soundboards.

I discovered that Jacob Heringman owned a Warwick Frei six course built by Michael Lowe with the original soundboard graduation. When I contacted Jacob he generously provided a lengthy account of his experience with the lute that includes a link to several tracks of his  Josquin des Prez CD where he uses his Frei. Jacob relates that Michael Lowe built the Frei six course with the graduated soundboard as an experiment and asked him to try it out before applying the finish with the intention of thinning the soundboard if he did not think that it worked. Jacob said:" My strong feeling was that he should definitely finish the instrument off leaving the soundboard as it was, without making any further changes. It felt pretty good right from the start, but I had the strong hunch that, because of the amount of wood in it, the instrument would take a long time to develop ... When the instrument was still brand new, I recorded several of the tracks on my CD of Josquin intabulations on it. It sounds striking and remarkable already on that recording http://heringman.com/Josquindepres.htm  Now, fourteen years on, it sounds even better, and it has certainly become more responsive and more nuanced as time has gone on... in my own collection, it's my favourite -- my 'desert island lute' and I'm so pleased that we kept our nerve and went through with the 'experiment'."

Building copies of historical instruments requires some detective work. Writing about them requires witnesses. I would like to thank David van Edwards, Bruce Brook and Tony Johnson : whose remarks I did not use but who pointed me in the right direction.