|
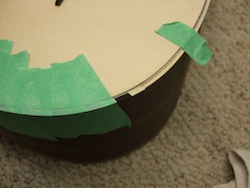
Unshaped barring on the Voboam(left) and
the beginning of a Lacôte (right). |
I always put a lot of thought into the barring pattern that I will use on a new instrument. Although all parts of an instrument work together and influence the tone production the barring is the single most important element. Even if I have built a particular model many times I will alter the barring pattern from one instrument to the next, sometimes to accommodate the playing style of a particular client and other times to appease my curiosity and need to experiment. Whatever I choose to do the decision is always firmly based on historical precedent as far as that is possible to interpret.
Unlike the record of historical lute construction that is now well documented, the same level of interest in the baroque guitar has only recently begun to develop. My own research has focused on the exterior of conserved guitars, by necessity, because their interiors are seldom accessible. At best, x-rays are available and occasionally technical drawings. There are two sources that I find valuable for historical information on Voboam guitars. The website of Daniel Sinier and Françoise de Ridder; http://sinierderidder.free.fr/ records their restoration of historic instruments with text and photographs, including their work on Voboam guitars.
 |
| Florence Gétreau |
The chapter, René, Alexandre et Jean Voboam: des factures pour "La guitarre Royalle" by Florence Gétreau in the book, Instrumentistes et Luthiers Parisiens XVII-XIX Siècles, edited by the same author, includes this diagram of the barring pattern that survives in several guitars by various members of the Voboam dynasty. In this work are descriptions and measurements of twenty-nine guitars from the various members of the Voboam family including drawings of peghead designs and other aesthetic details. This is essential reading for anyone interested in building models of Voboam guitars.
On previous models I have used number 5 and number 8. But liking to experiment, I was intrigued by number 9 -- although I was worried that the treble side would be too firm. I have a photo of the inside of the belly of this guitar but I dithered for some time unable to make up my mind. The diagonal extends beyond the bridge line and a finger bar is used for even more reinforcement. Wouldn't that be too stiff?
 |
| photo by Thomas Georgi |
Then, I realized that the finger bars are tiny and must be intended as a kind of secondary moderator. The diagonal, low and sort of fat and very rounded on the top is shaped very much like a violin bass bar. And, I think, serves the same purpose of providing an element of localized stiffness without adding a lot of mass.
The player who ordered this instrument intends to play with nails (artificial ones glued on at a salon) so I knew that it would take a stiff, regulated belly to stand up to that kind of attack.
Here's the finished belly ready to be glued to the ribs. I have been making diagrams of the bellies of my lutes and guitars for 30 years so I have a record that I can consult form instrument to instrument. Here I've written the measurements on the spruce. I'll copy those on a tracing of the belly, draw in the bar positions and list their height. The measurements are in thousands of an inch.
Note that the diagonal falls well below the bridge line that is visible just below the top of the finger bars. The diagonal tapers from 6mm wide and 10.2mm high in the centre toward each end where it is 5.5mm wide and 7.5mm high. The fingers are 5mm wide and 6 mm high at the back edge tapering to 0 just beyond the bridge line. The belly is basically 2.4mm thick over-all, thinning a little through the waist area.
***
All images on this site other than those so labeled are by the author. Readers are welcome to use my material with attribution. For other images I have endeavored to accurately attribute copyrighted material.
If any copyright holder wishes me to withdraw their material I will do so.
schreiner@sympatico.ca